Perfect Asparagus Every Time: Mastering The Art of Dry Charring
Disclaimer: This page (and every other page on this website) includes the use of affiliate links. If it doesn’t, I’m doing something wrong and that will change expeditiously. Why? I’m trying to get paid, y’all! Rest assured everything I promote is something I personally use or believe in.
Native to Eurasia, asparagus has traveled across the pond and into our hearts. The flowering plant has many health benefits and even more uses in the culinary arts. Asparagus is rich in B vitamins, insoluble and soluble fiber. potassium, antioxidants and more. Asparagus comes in green, purple, and white though the latter two may be more difficult to find depending on your region. This vegetable is used a variety of cuisines and dishes including but not limited to: salads, stir-fry, quiches, omelettes, and stand alone side dishes.
If you’re anything like me, you’ve struggled with getting a perfect cook on asparagus. There are a variety of ways to prepare it but each method becomes more complicated then the last. Grilling isn’t always feasible and boiling often ends up with an overcooked, soggy mess. I have the answer to your prayers: dry charring. Once you try this method, that roasting pan is sure to be forsaken. Now, many people will say I’m late to the game but I am certain there are others like me who have been left in the dark for far too long. Let me put you on.
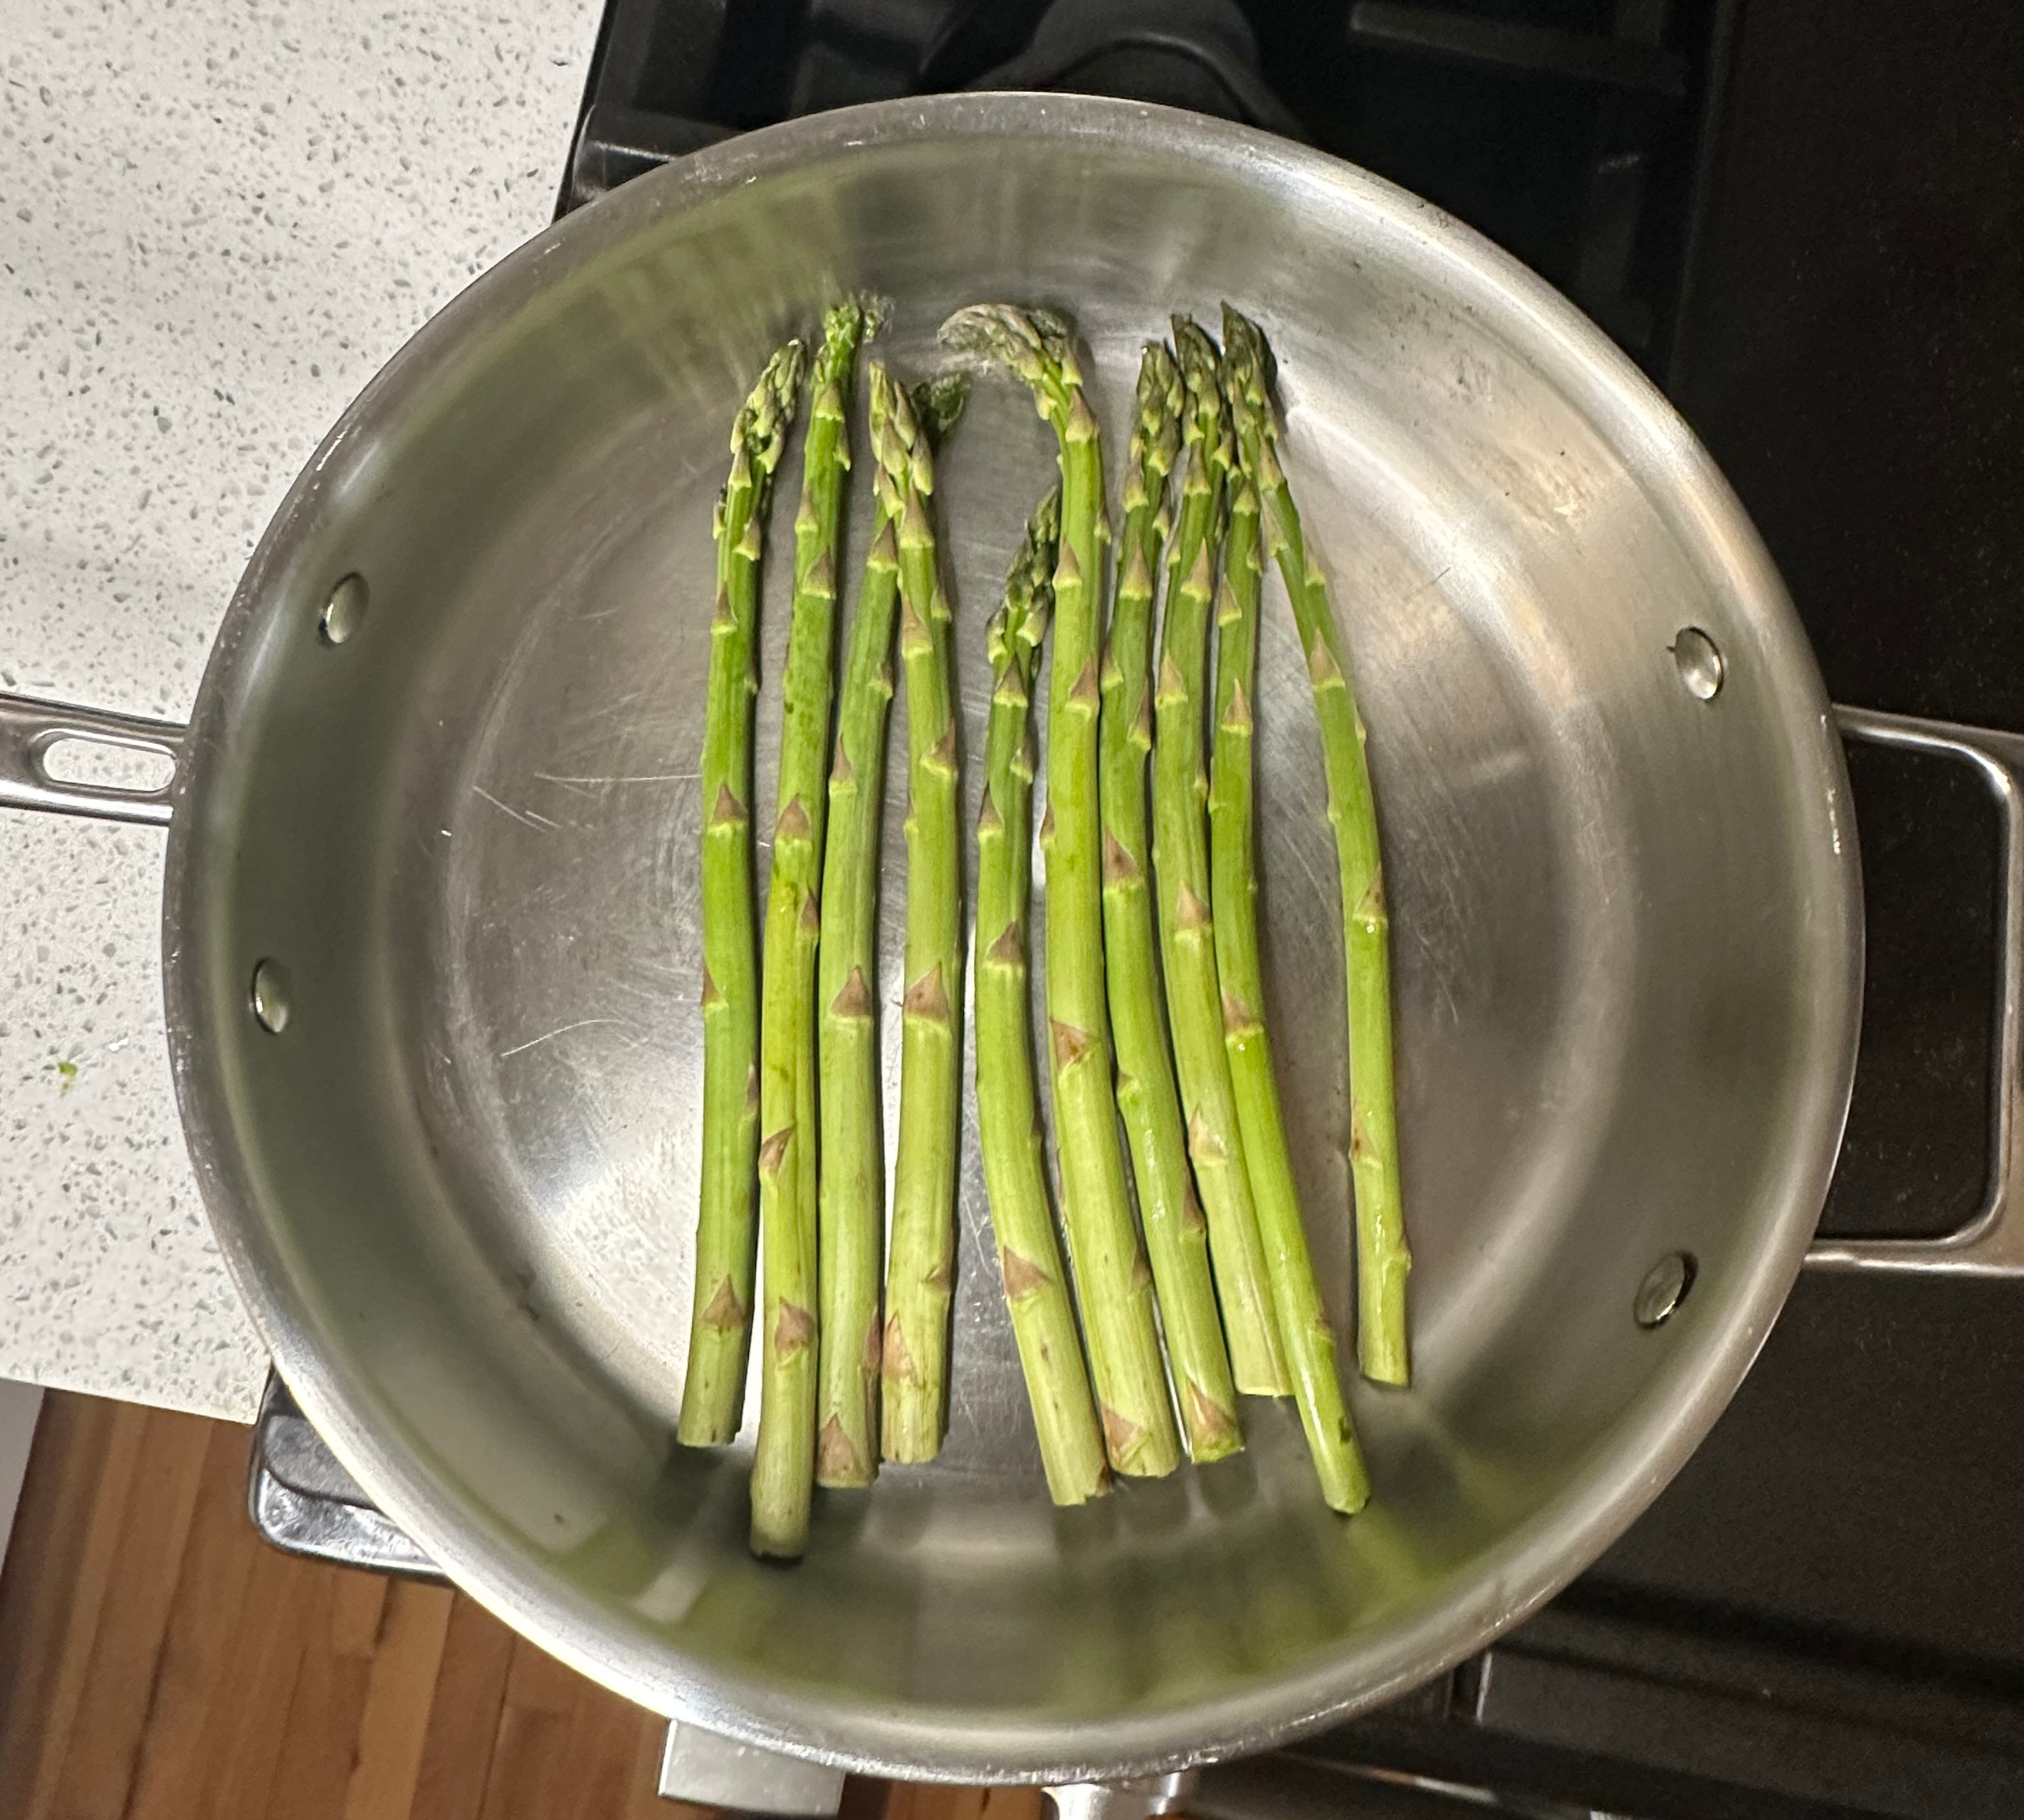
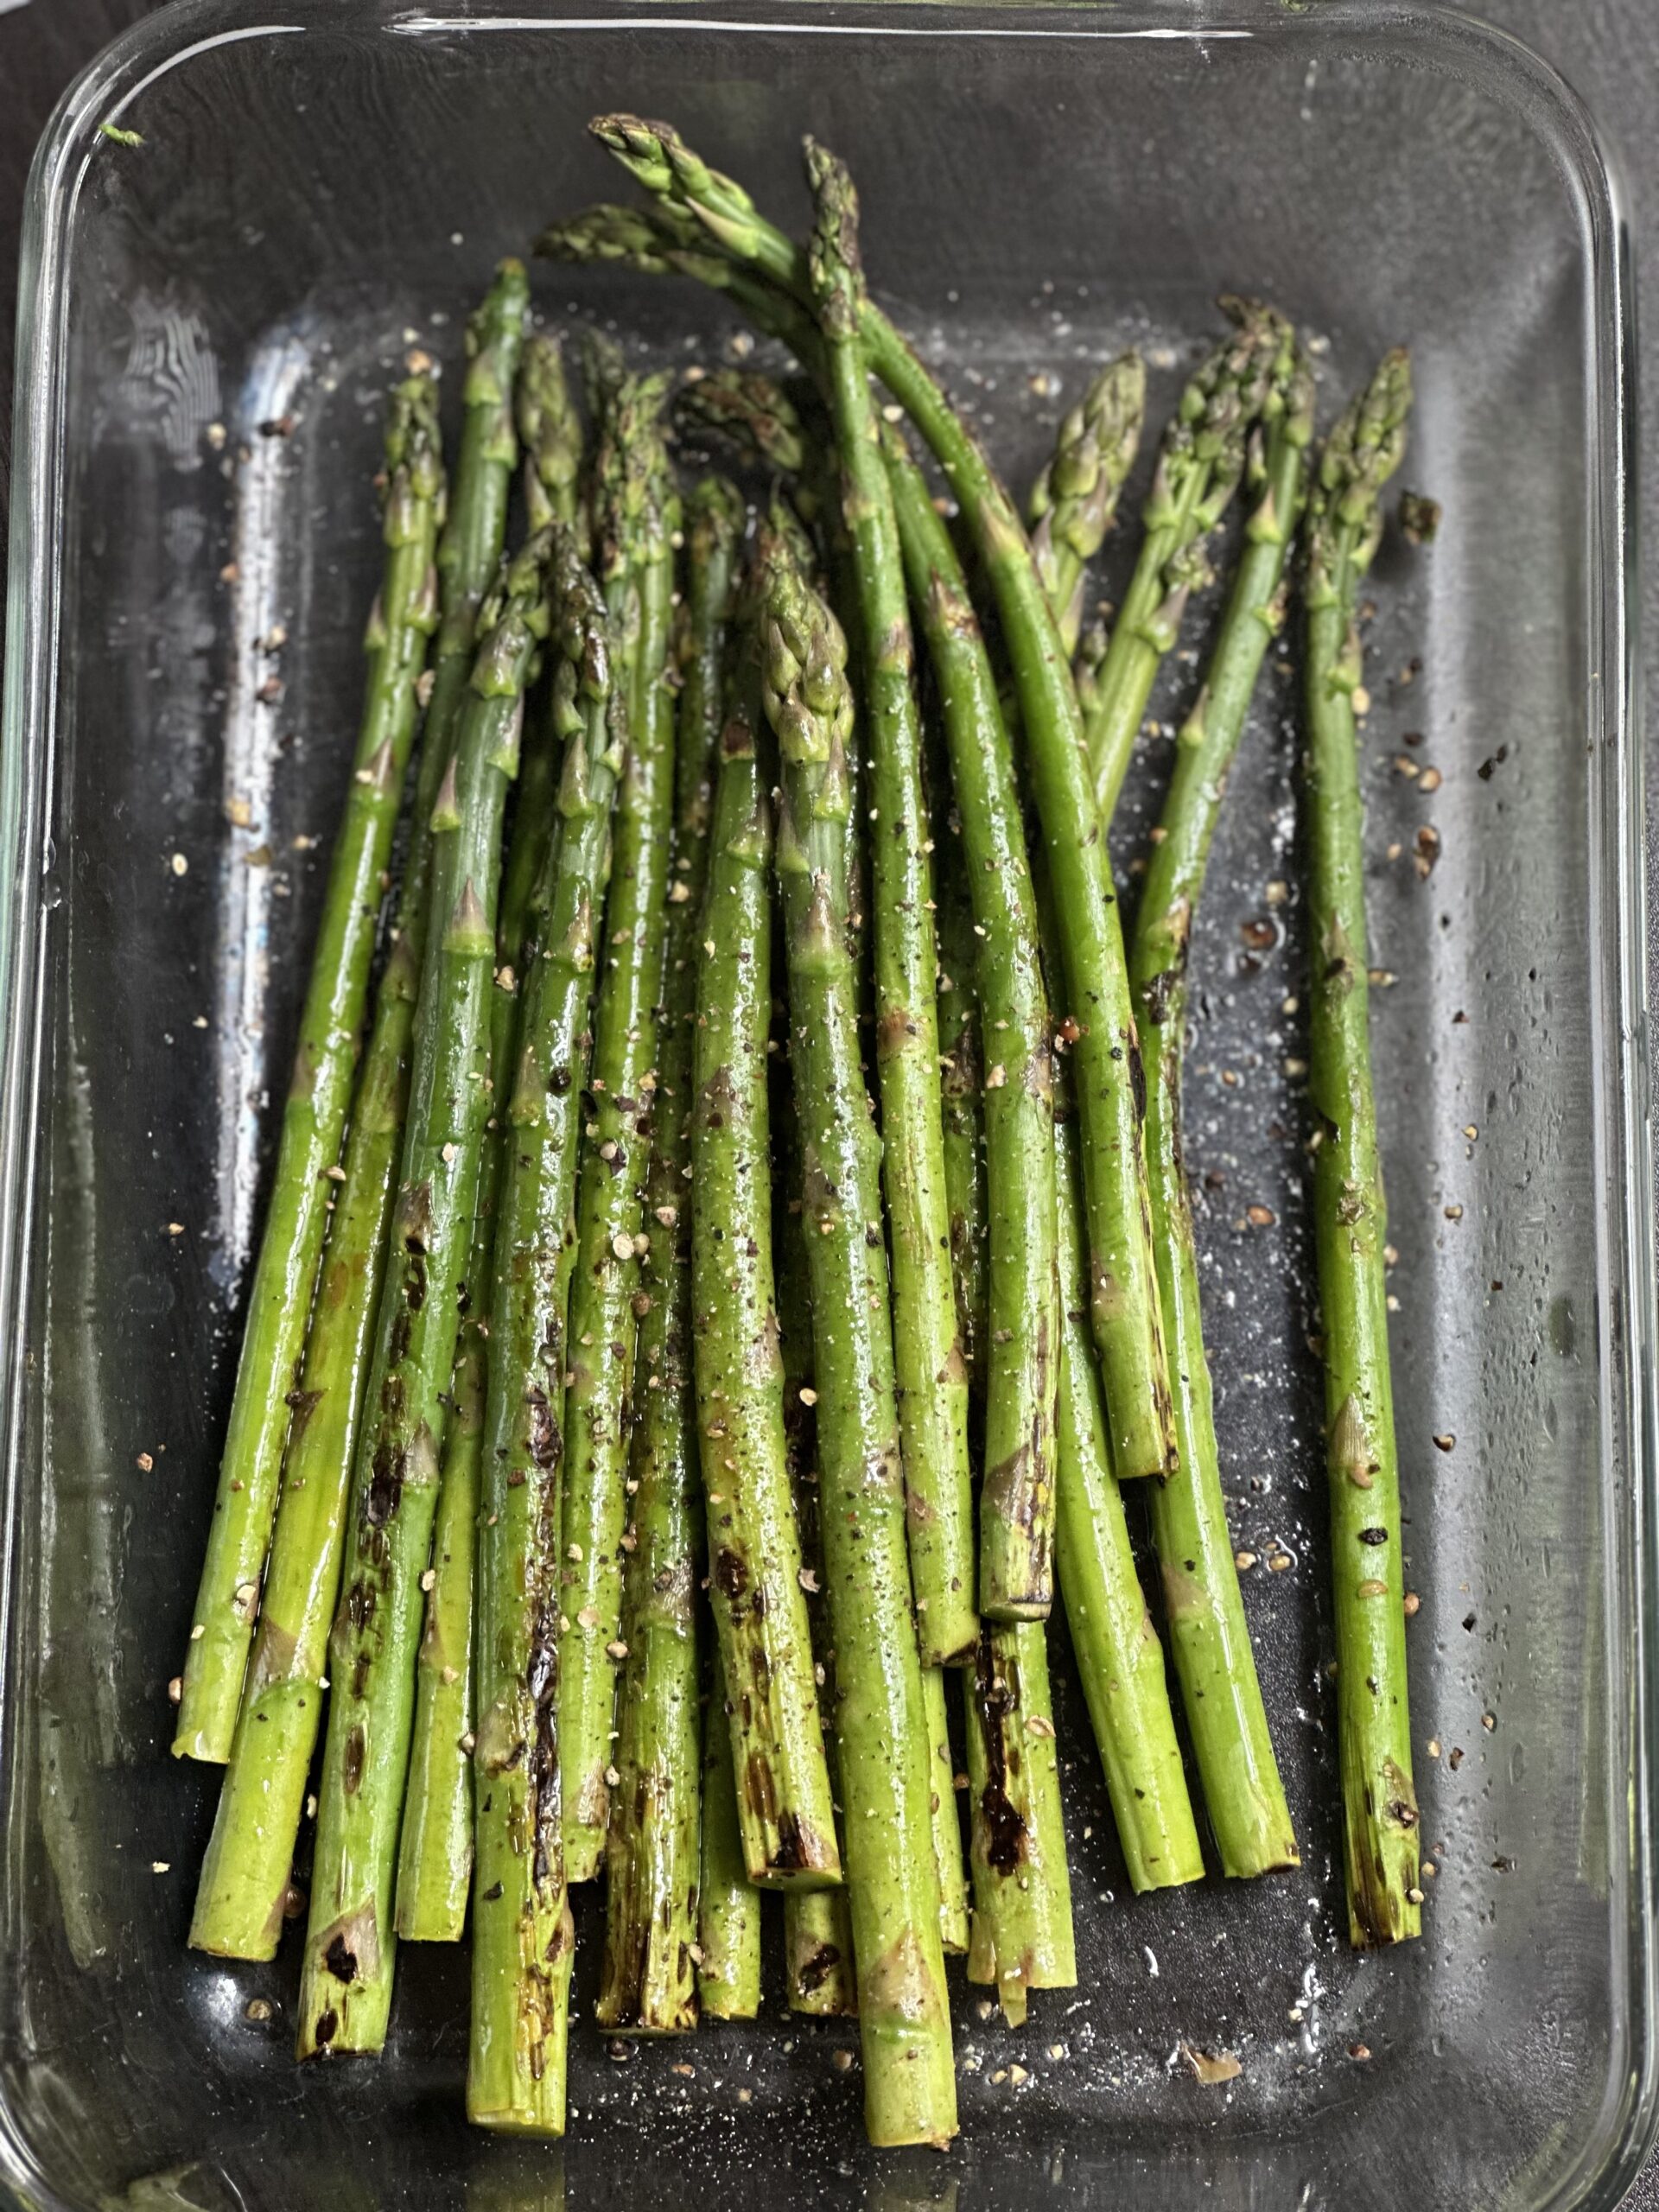
Prep your asparagus as usual. Make sure your saute pan is bone dry. The asparagus should be dry as well. You don’t want any moisture at all in the pan. You’ll add fat later. Just trust me here. Heat the pan on high and get it as hot as possible. I always open a window(and a door) and/or temporarily deactivate my smoke detector when I’m searing or charring. When the pan is hot, layer the asparagus as you see above. You will have to cook in batches because you do not want to crowd the pan. I always use a stainless steel pan for this. I am not sure if nonstick will have the same effect so I will experiment and update.
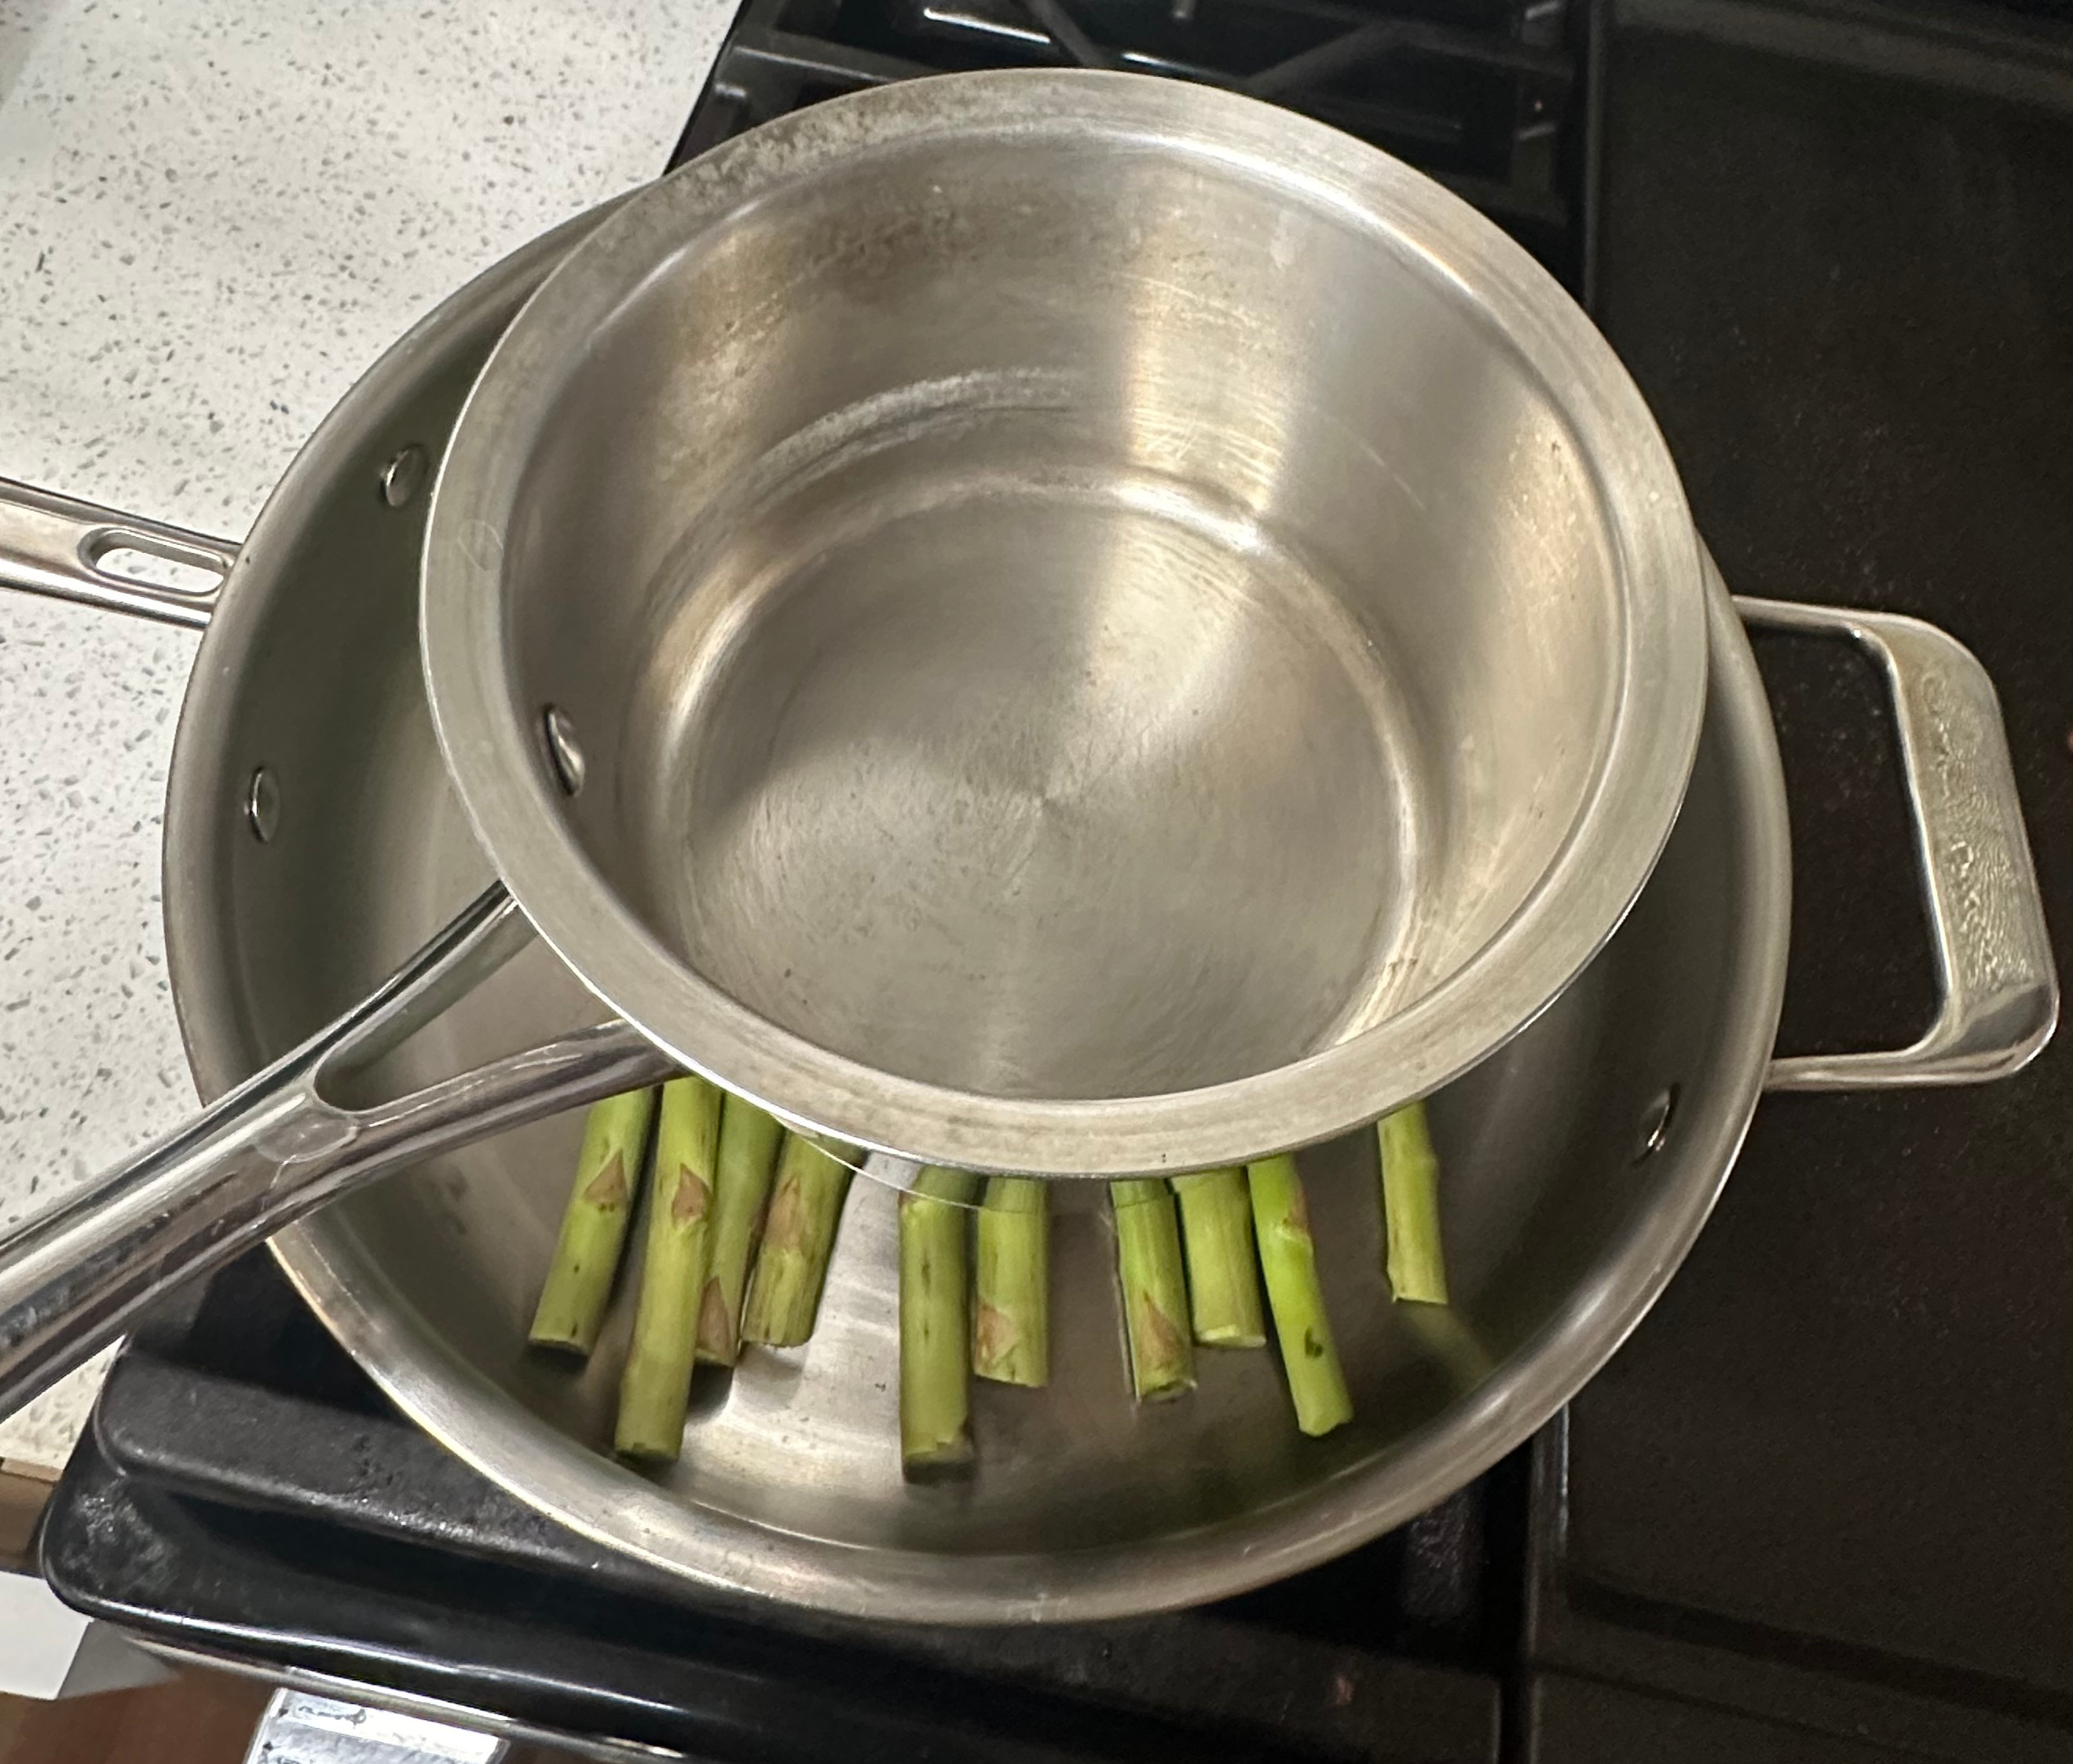
Using a grill weight or a saucepan, apply pressure to the asparagus. The weight will ensure an even cook. I usually just leave the pan in this state and prep or clean up my work area. This process should take about 2-4 minutes per side depending on the size of the asparagus stalks. Larger stalks will be easier to flip but will take more time.
When the asparagus begins to turn bright green, flip over each sprig with a pair of tongs. If the asparagus doesn’t have char marks, replace the weight for another minute or two. This step is increasingly difficult if you previously crowded the pan earlier. (I love to say “I told you so”) Place the weight/saucepan back on the asparagus to sear the other side.
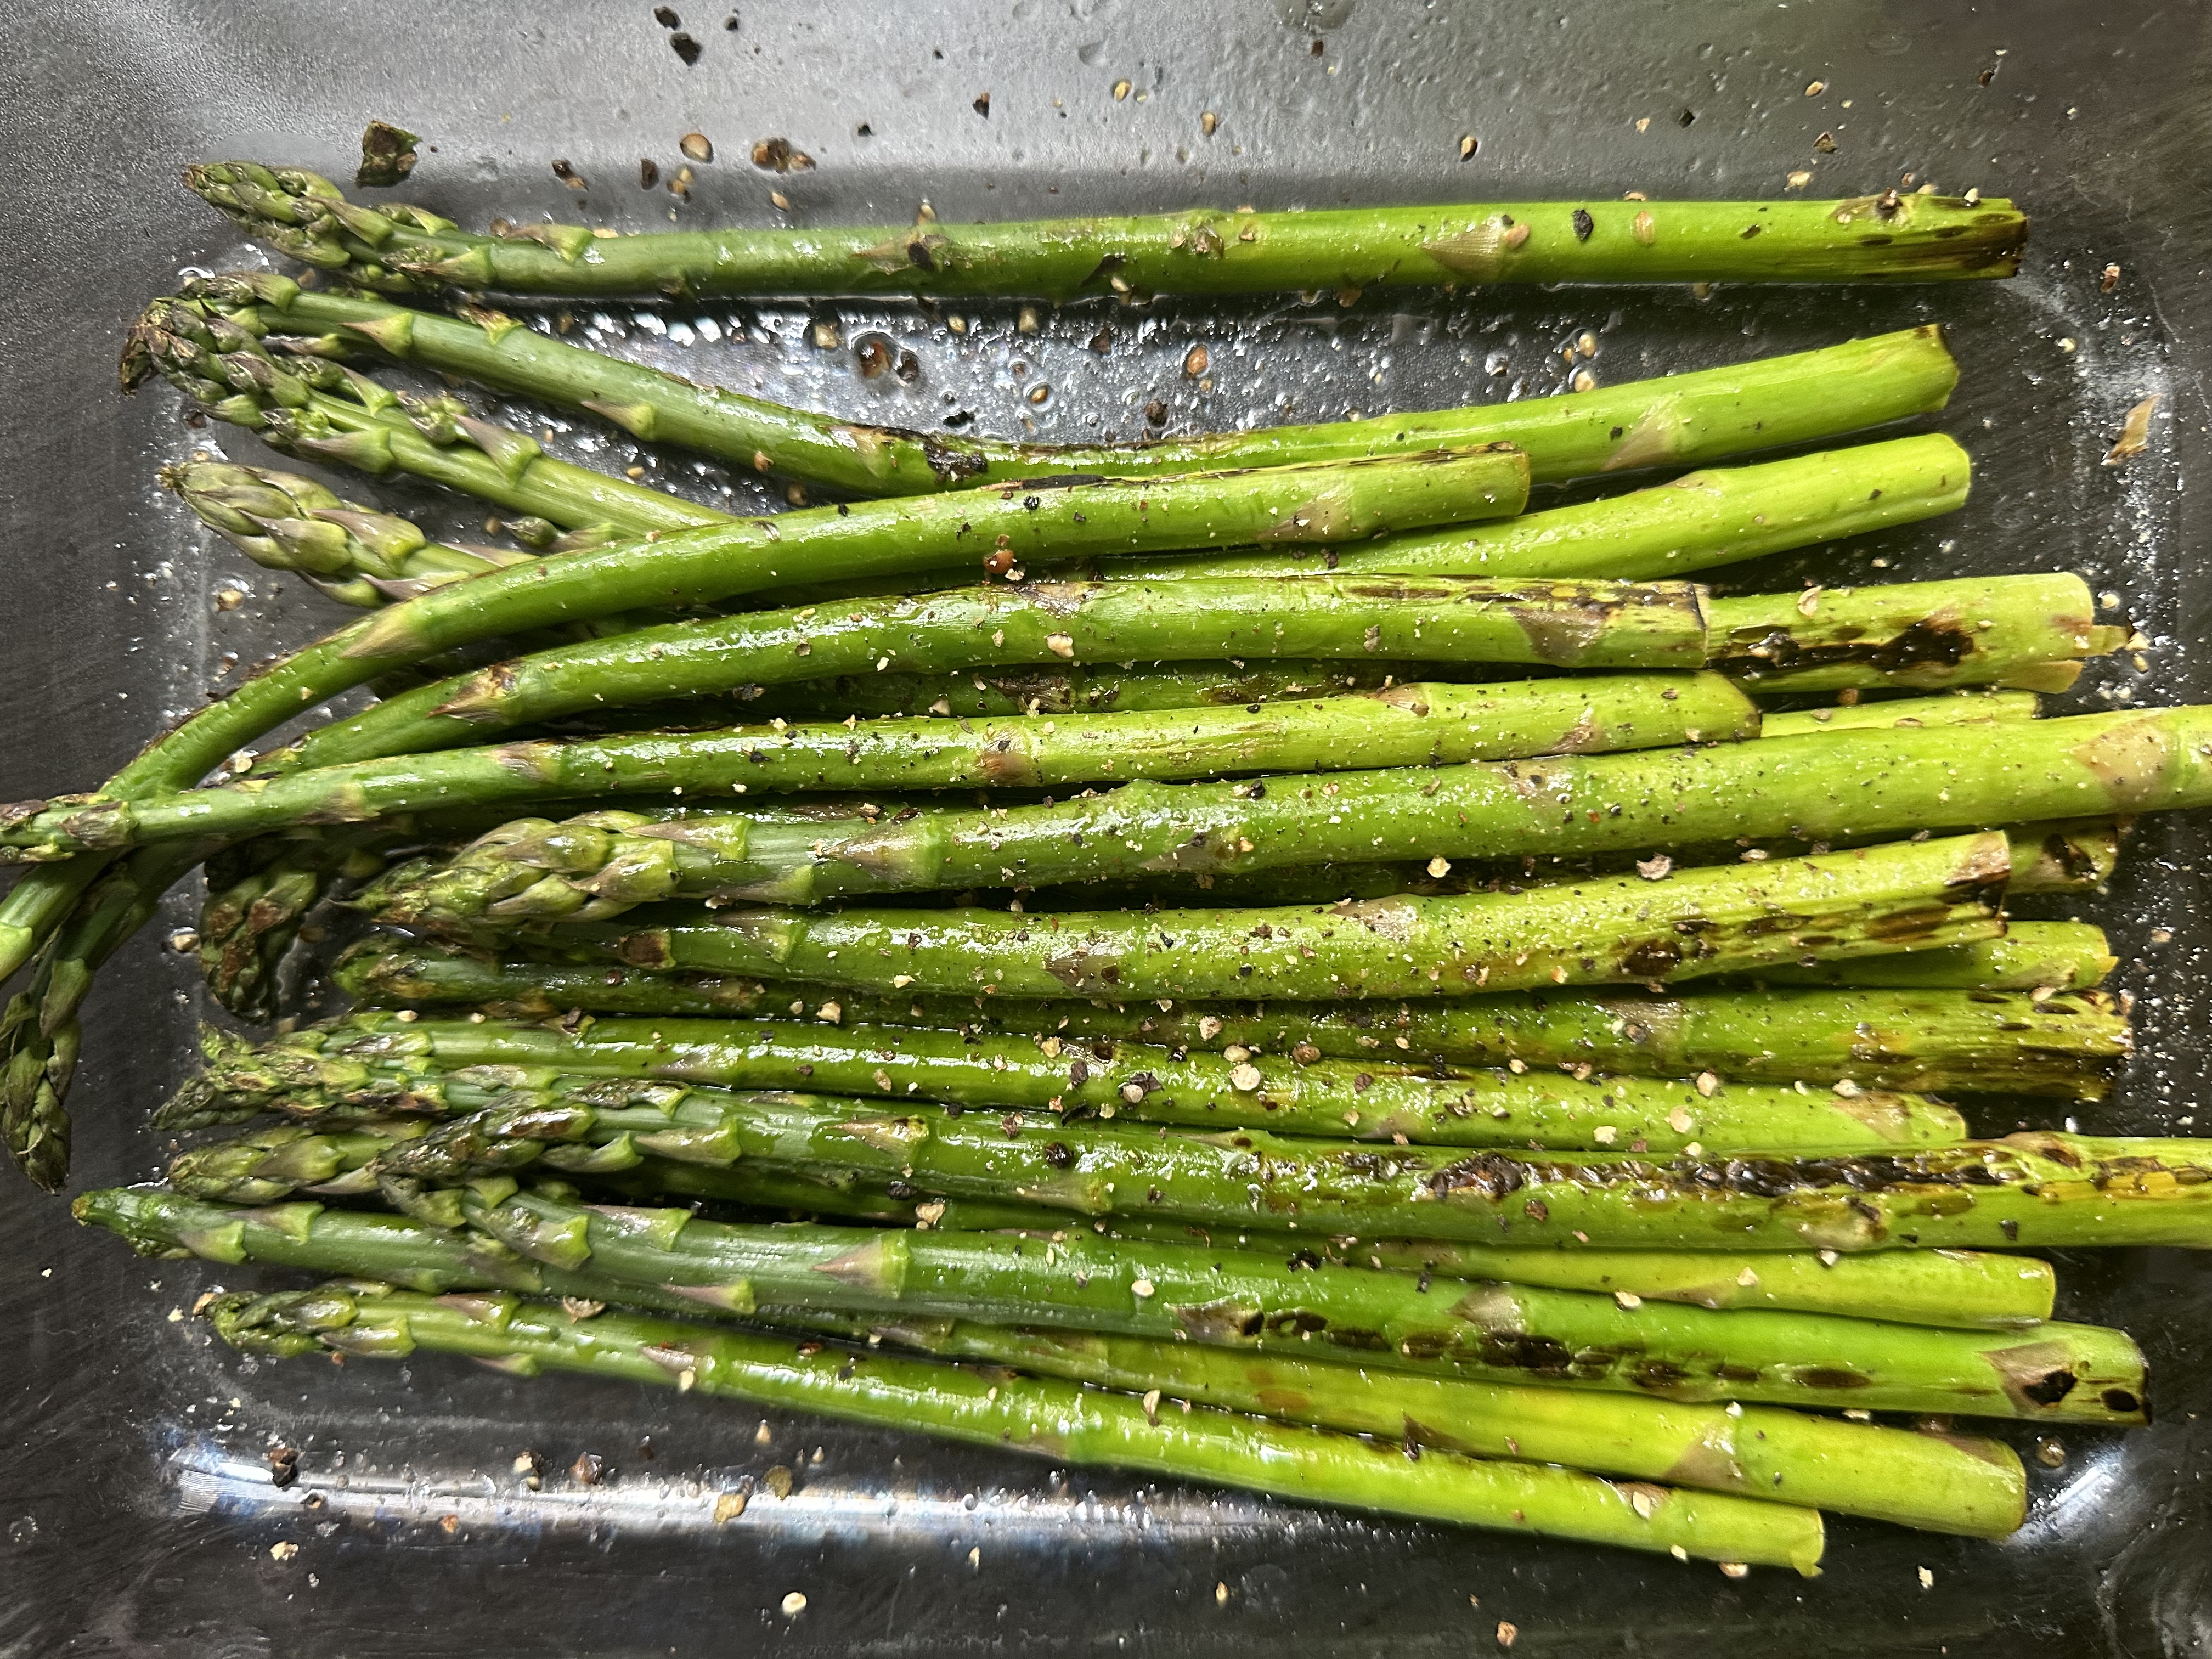
After you remove the asparagus from the heat, you can chop it or leave whole. At this point you’ll add whatever seasoning you’d prefer. Don’t forget to add fat so that the seasoning can adhere. Grapeseed oil is what I used this time but butter is my go to. If you’re using butter, make sure that the butter is cold as melted or every super soft butter will drop to the bottom of the pan instead of sticking to the vegetables properly. I like to keep the base simple with salt, cracked pepper, and lemon juice. From there, I can chop it up and add it to soups and salads or keep it whole and incorporate it into a composed dish. I like to keep my “meal prep” and garnishes really plain so that they can easily be used with a variety of flavors throughout the week.
Equipment
- Stainless Steel Pan: This Misen pan is my go to for all things seared. They also have a high wall 3qt version that I like a lot as well. The pan pictured is the 3qt but I do think the low wall and wider surface area of the pan that I linked is a better option
- Stainless Steel Saucepan: Any heavy bottom saucepan will work for this method. Really you should be using a weight but I don’t have one yet and I’m assuming many of you don’t either. If you don’t have a stainless steel saucepan, I implore you to purchase one before you buy a grill weight.
- Tongs: Tongs feel self-explanatory to me. I prefer the commercial kitchen style like the ones I have linked here but the silicon-tipped bad boys have a place in my kitchen as well.